Create Your Own French Impressionist Water Lilies Video
In Part 3 of our Claude Monet French Impressionist series, Barbara will walk you through creating your own French Impressionist 3-D flowers and lily pads using coffee filters and markers.
Claude Monet – French Impressionist Lesson Curriculum
If you missed watching Part 1 or Part 2, you may want to catch up with those first.
Materials Needed for Claude Monet’s Water Lilies Art Lesson
- Sponge
- Coffee filters
- Washable markers
- Newspaper
- Green construction paper
- Glue stick
- Water
- Paintbrush
Scroll to the bottom to see examples of the finished artwork.
Complete Your French Impressionist Art and the Claude Monet Art Lesson
Using the video transcript below, follow along with Barbara as she demonstrates how to create French Impressionist flowers and lily pads in this art lesson.
Now going back to the first one that we made, I want to show you how to make some flowers. I want to stick some flowers on there. We’re going to do a little collage on top of our drawing and so I want to show you how to make some flowers. And to do that we’re going to use coffee filters. So here I’ve got a piece of newspaper. I’m going to take my coffee filters and I’m going to do two at once because this paper is so absorbent. You know when you make coffee and you take the filters out of your coffee pot, they’re all brown, and that’s because they’ve absorbed the coffee, and so there’s a couple of ways we could do this.
We can use markers. Now these are washable markers, so it has to be water soluble markers to do this. To make this work, so we’re going to take our markers and we’re just going to mark on here. Probably colors that we think would be good. That we think would be good for flowers, so we probably don’t want to use brown or black. We’ll probably just want to use yellow and orange, maybe red. Here’s orange – oh that’s bright, isn’t it?
So, what we’re going to do when we get done with this is we’re going to get these coffee filters wet. And because these are washable markers, they are going to just spread out. And they’re going to make – the color is going to go right through the first one and into the second one. And they’re going to be really pretty flower colors when they’re done. But you could do this with watercolors as well. I’ve got some that I made earlier that I’m going to show you. One was done with watercolors, and one was done with markers, and they look amazingly the same when they’re finished. This one should have purple in there. Maybe. Let’s put some purple in there.
And again, this is your flower, so you can do it any way you want. OK, so now we have our flower and we’re going to take our water here. Watch what happens.
Making it really wet. And all the colors going to start to bleed. Remember, I said I had two coffee filters under here. That’s because the color it’s going to bleed from one coffee filter right into the other one. Make sure that said washable – it does. So now let me lift this up. Now look at that. Let me turn this over. Get that to bleed a little bit more.
Well, look at that – isn’t that amazing! You would never think that it would do that, but it does. So, I have some I made this morning. A little more pink in these – and the ones I made this morning are already dry, which is what we need for what we’re going to do this. So, if you do this at home, you’re going to have to let these dry. It doesn’t take very long to dry – only about an hour – so, one of the things we’re going to do is we’re going to do some – where did I put my lily pads, I cut some lily pads out earlier. Where did I put them?
I cut some lily pads out of green. Now you know lily pads, if you’re looking at them straight down. So, if you were looking right down at a lily pad flat, it would be round like this, but we’re looking kind of across it, so it’s going to look more like an oval and one of the things that lily pads have on them is they have – a lot of times they kind of have a thing that looks like this. They’re kind of split. They’re kind of split like that. It almost looks like a little mouth, but really, they’re just split.so we’re going to make him look like they’re split. So, they look more like a pad.
So, we’re going to take our glue stick. And we’re going to put them on the first one we did, which is pretty much dry. I’m going to just blot it with a piece of paper towel to make sure it’s dry, because I don’t think that my glue stick is going to stick very well to wet paint. We’ll just make sure that we got most of the wet off. Oh yeah, it’s pretty dry. Look at that. Hardly anything came off.
OK, so we’re going to take our – And this is pretty heavy paper too. If you do this on the real thin paper like, it’s not going to work that well. Because the wetness of the paint will just make the paper crinkle, so we need to use paper that’s heavier than usual. If you don’t have any paper that’s heavier, you could even use a paper bag – that would probably work OK, so here’s our lily pad. And Here’s our Second pad. Here’s our third one. Stick a little more glue on that to hold it down, now.
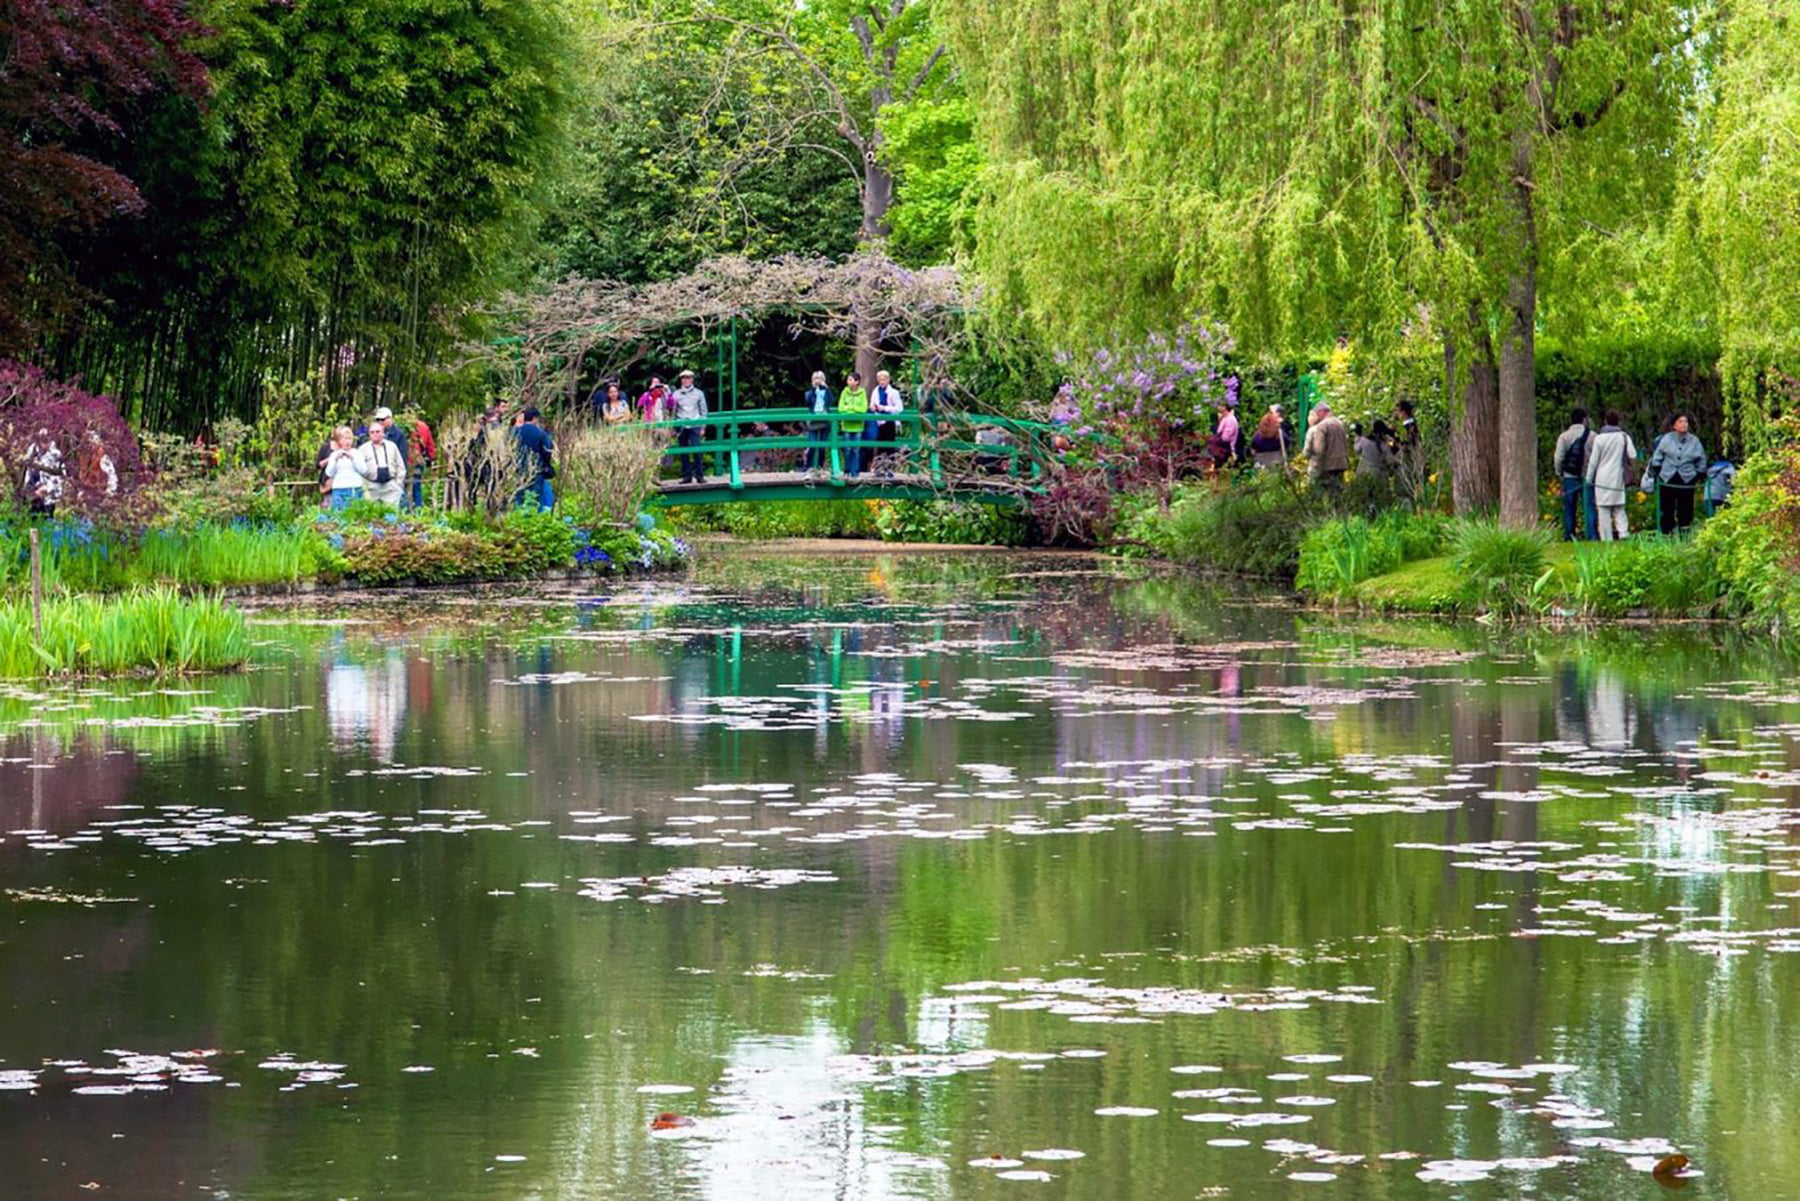
OK, so now we’re going to take our flowers and really, you know when you have a flat, you just kind of crunch it up to make it into a flower. Just like that doesn’t need to be fancy, it could just be all crunched up. And then we’re just going to put some glue on the back of it and stick it on the lily pad. So, I hope one day that I get to go to Giverny, France, and see Monet’s Garden. I would really like to do that, but if I can’t go there, I can go on the Internet and look at all the pictures of it. There are so many pictures of Monet’s Garden and of his lily pads. And. It must be a really, really beautiful place. There’s a big house. And I’m sure you can go there and have a really nice lunch. They probably feed you. It was pretty nice of Monet’s son to give the gardens at Giverny to the French people, wasn’t it? But Monet was so famous.
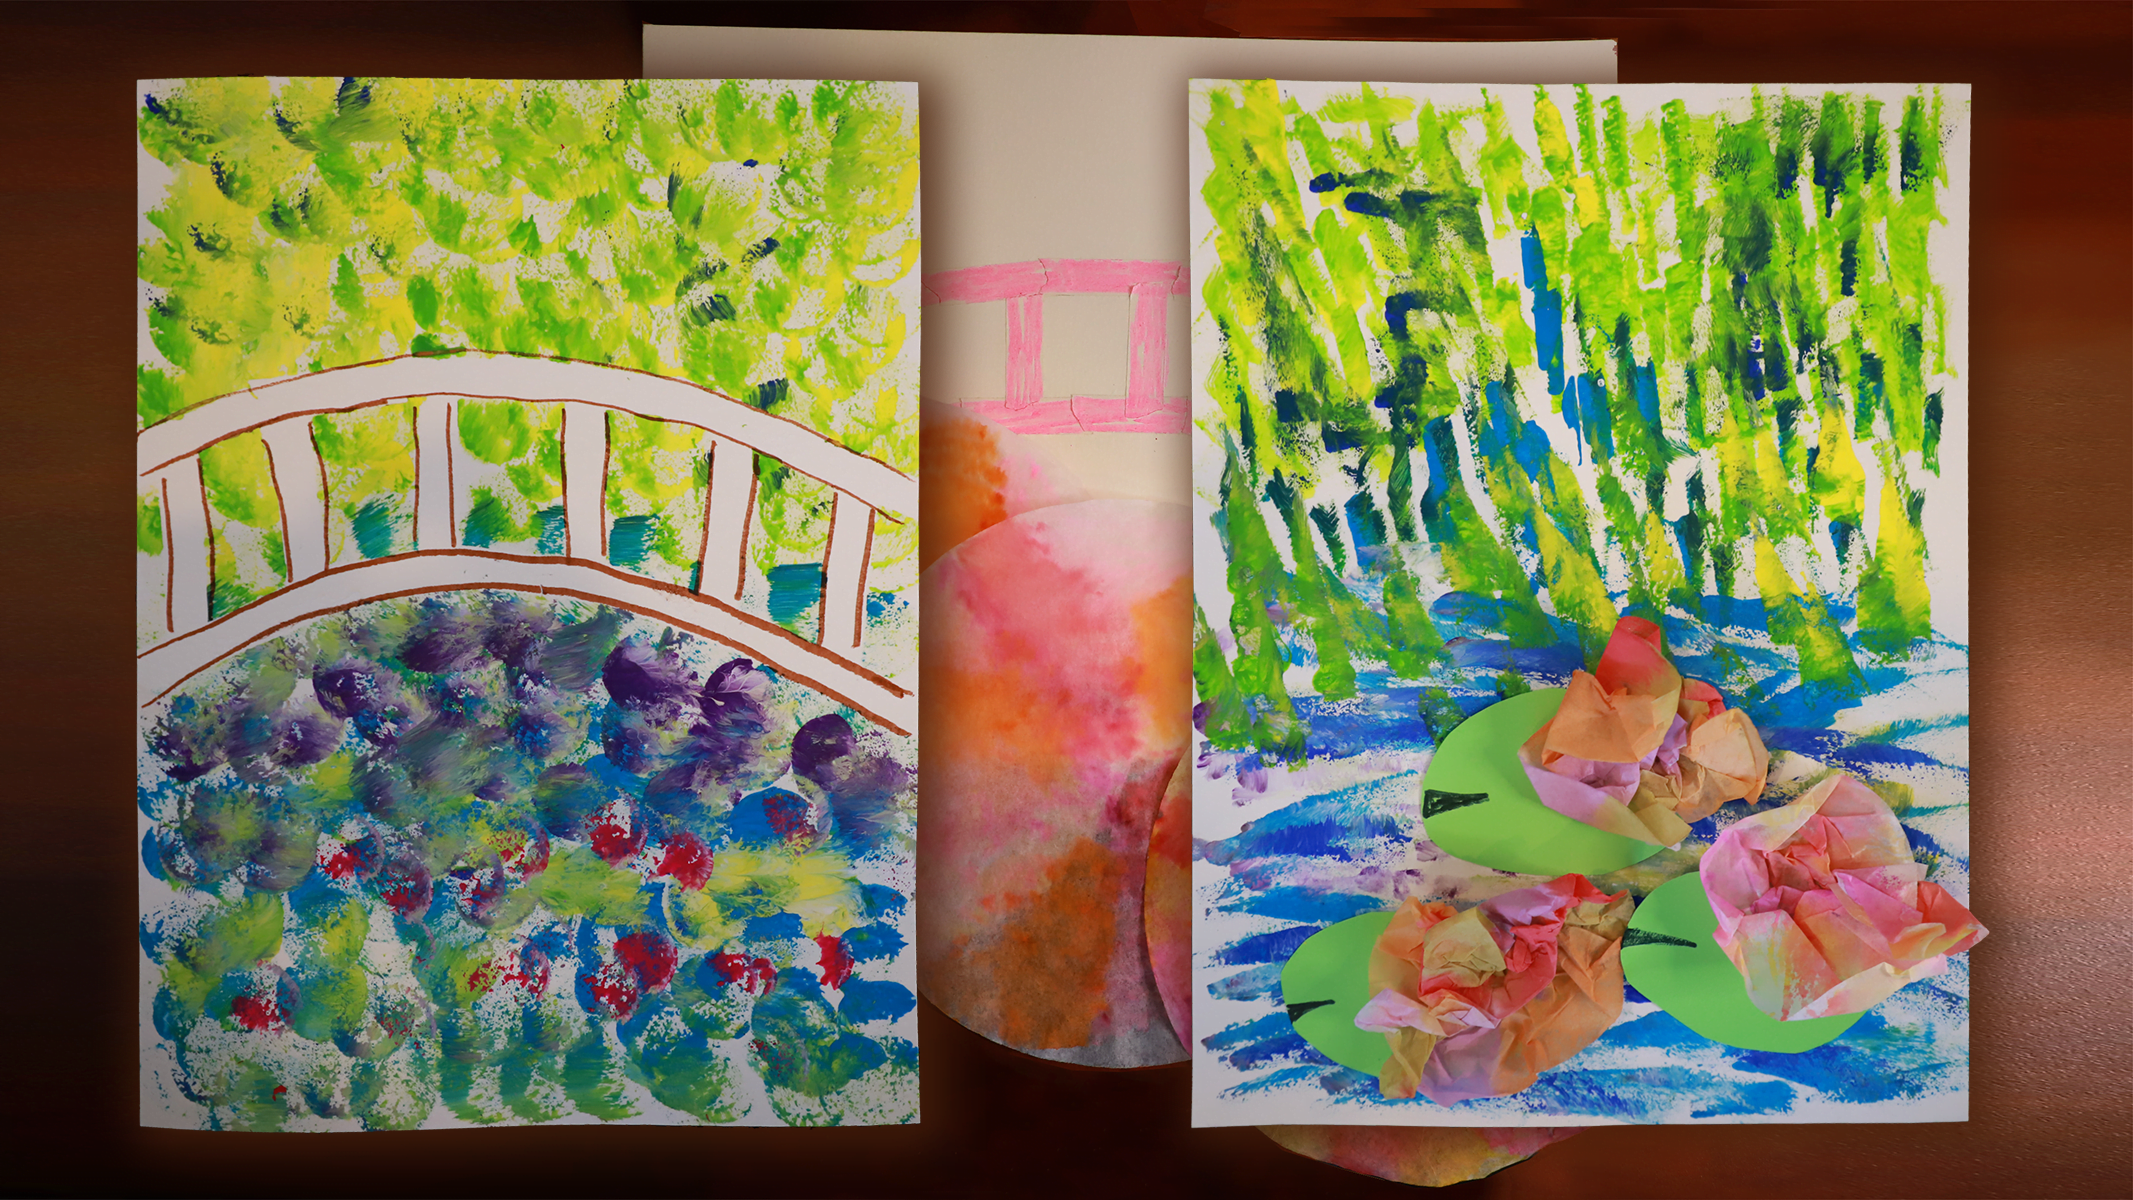
So here we have our lily pads with our flowers that we made from our coffee filters – and look at that. Now we’re going to go back to this first one that we made and we’re going to take the tape off. So, watch what happens here. So, this is artist tape, and it peels off real easy. And the other kind of tape that peels off real easy is painter’s tape. So, if you have that blue tape – painter’s tape – you can use it and peel it off. Look at this – it would have been really hard to draw this and try to do this painting and not get it on our foot bridge. But because we use tape to kind of block it out – and you could do this with other artwork to. You could try putting down tape and then painting around it and then taking the tape off. It would be really fun to do that you might be able to do some really fun things with that.
Now, because we actually have the painting behind the bridge. It really looks like it should be there now, and if we wanted to, we could take a marker or we could take – maybe we’ll use a marker. We could take a marker and we could say. Let’s use this blue one, and maybe we shouldn’t use blue. Maybe we should use brown because this whole thing is blue. Let’s make sure this one works, Yeah, we could use a marker and we could say OK, what I’m going to do here is I’m going to draw my bridge in. You could see if you drew this in ahead of time – If you drew this in ahead of time, how hard it would have been to make that tree in the background look like it’s behind the bridge or would have been almost impossible. So, here’s our railing and our slats so we don’t fall through. Now we could paint our bridge any color we want. Or we could just color it with the markers. And there we have Monet’s Bridge. And his water lilies. And we could even glue some of these colored water lilies down here if we wanted to, as well. But I kind of like it just with the paint.
So, I hope that you will go on the Internet and maybe look at some of the paintings that Claude Monet did. We’re going to put some of those on the Internet for you to look at and you have coffee filters – if your mom and dad drink coffee, you can get coffee filters, so it’s pretty easy to make these beautiful flowers.
So, thank you so much for joining me at Golden Road Arts today, and I hope I’ll see you again soon now. I’m going to leave the room, so I’m going to put my mask back on because I don’t want to make anybody sick, and I don’t want to get sick. But soon everybody will be vaccinated, and we won’t need the mask. So, we’ll see you again at Golden Road. I’ll see you next time.
Join Us to Support Free Online Art Lessons for Kids
If you enjoyed this free online art lesson, please consider making a donation or purchasing something from our online art gallery to help ensure more free art lessons are available for elementary and middle school aged children.