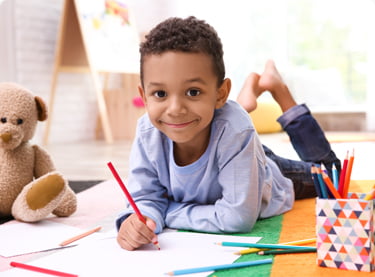
Encouraging resourcefulness is one of the reasons why kids need art from a young age. If you have access to some household art materials, the only limit to your creativity is your imagination. And with that thought in mind, we have a lesson featuring accessible art supplies.
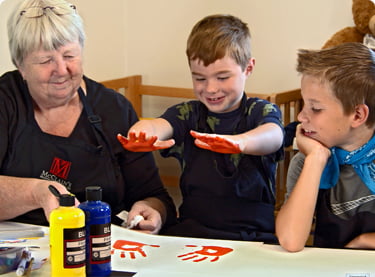
In this lesson, artist, printmaker and educator, Barbara Mason demonstrates a number of straightforward art projects suitable for young children. Projects include using lines and shapes to demonstrate movement and helping teachers and parents create crafty books and finger puppets.
Materials Required for Easy Home Art Projects
The materials used for these art projects are paper, glue and tape, along with some general household objects.
Easy Art Projects To Do at Home Video
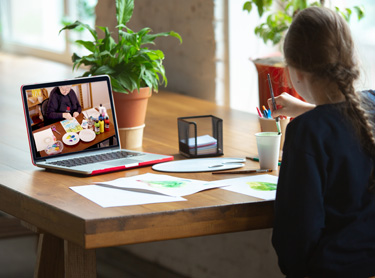
Barbara teaches several beginner-friendly art projects you can follow along with at home using simple household objects.
Easy Art Projects with Crayons, Markers, Tape and Paper Lesson Plan
Beginner Art Projects Using Household Items
Follow along using the video transcription below as Barbara Mason helps children, parents and teachers learn how lines and shapes demonstrate movement in design.
Artists along the Golden Road experience the northwest through its art and the artists who live here.
We are going to do a simple project today. This is a hot air balloon. Kids love hot air balloons. I like hot air balloons myself. As long as I’m on the ground when they’re in the air. So a balloon, it’s just a big oval, and instead of being connected at the bottom, it’s flat. And then it has these lines that come down. These are the strings that hold the basket. In this little basket people actually ride. I don’t know. They have a death wish I guess. I’m not riding in anything that’s going up in the air with heat, but some people actually love it. You can see we have our hot air balloon, drawing this with a pencil, and then I’m going to go over it with black marker. You can see that If I have my balloon, and I make my patterns inside, I just draw the line straight across, it doesn’t look very round, It looks pretty flat, it’s not very attractive.
So what we want to do is we want to make our lines go in some kind of a pattern, it could be a circle pattern that like this that makes it look round. You brought it out from the top, kind of like an umbrella. So you just have to think about you know if you want it to look flat, or if you want it to look like it’s got some dimension to it. So we are going to make the pattern here. And then I’ve got lots of lines drawn here, some vertical lines as well as our zigzag line.
And then one of the things that that you know hot air balloons are very colorful. So to go back and color each one of these sessions at different color, it will be a beautiful hot air balloon. So you wanna do that? Be sure to get your name on the paper. I always thought like kids to get their name on the paper so they look remarkably like when they’re done. You wanna make sure that each child gets their own. And we’re actually going to have a template of this on our website when we get everything done so that you’ll actually be able to download a picture of this hot air ballooning. You can just use that if the children are too young to actually draw their own.
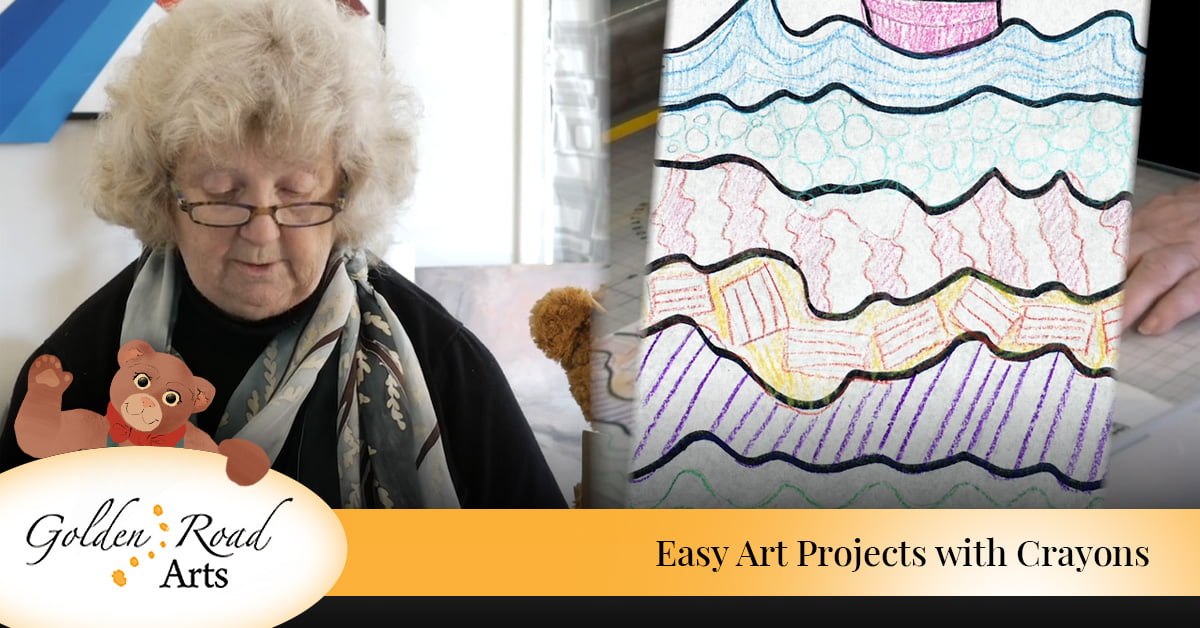
The next process that we’re going to do is a boat in the water. What we’ve done is just a crayon drawing. And I’ll just emphasize it with my black marker here. So you just start out by making these wiggly lines. This is the top of your water, and then on the top of the water you have your boat. And with its mast, and it’s a sale. And each one section of this is going to have different pattern. And you can do any pattern you want. That’s a great thing about art. It’s pretty hard to do it wrong. You can see that I have drawing here lines, circles, squares. Just everything that you could possibly think of, and then I’ve colored each section a different color. So when I get all done with this, we got this really nice drawing. And it was very, very easy to do. This will keep kids occupied for quite awhile, and it’s a good section where you can talk about boats, and talk about water. There’s just lots of possibilities for teaching with something like this.
Then the next project we’re going to do is a squiggly monster. I wish I could say that I thought of this myself, but I actually saw it on the Internet, and I just thought it was so attractive. What you do is you take a piece of paper, get a clean sheet here. Take a piece of paper and you fold in half, and you just start to draw your squiggling lines across the paper any way you want. Does matter how you draw it, It’ll all be good. You can see I’ve got my real squiggling line, and I’m going go over this with a black marker because I want to be able to see through the paper. These are washable markers so that if the children get them on themselves, in theory you can wash them off, wash out your cloth-maybe. It’s always a question of whether that will happen. At this point when you look at it, you can kind of see it through here, but not really well. So what you really need to do is take this to the window. Hold this up to the window where you can see through it. I hold it up to the light. Can you see through it a little bit, but you can see through it, and then draw it. And then what you do is you open it up. You open it up like this, and you say OK, what looks like the top and what looks like the bottom? What part do I think would be the head? You can see on this one, I made the head actually right in the middle. I didn’t put it all the way at the top. Children can do whatever they want, and then they can do lines across here. I just colored it different colors, but they could do it any way they want. These are kind of squiggly monsters and very very pretty. So a fun thing for kids to do. Easy doesn’t require much crayons, markers and paper.
Another thing you can do with kids- this is really really fun, kids love this- these are masks. How you do this is you take a piece of paper, folded in half, cut it in half. Because kids have small faces, you don’t want it to be huge. Then you want to say this is the nose, this is probably the middle, so we’re going to do a mask of some kind of an animal. Then we’ve got to have an eye. And kids eyes are remarkably close together, because their faces are small. You think, oh, you put the eyes over here, but really, they have to be pretty close together for the kids to see out of them. And then we’re going to do some kind of a little nose thing here, maybe an eyebrow. And then we’re going to have some kind of a thing that goes around, maybe an ear. It goes around like this. This doen’t have to be really fancy. It doesn’t even have to be the same on both sides. It can be very very simple. You have the kids cut it out, color it, and then cut the eyes out. It’s very, very hard to cut these eyes out, But if you get a small scissors, and you kind of poke it right in the middle, and then if you cut from the back, it’s fairly easy to cut out the eye. There you go. You can either tape, or poke a hole and use some yarn or string or whatever you have to tie it on to their face. What happens when you’re using paper that is lightweight, like this computer papers, where you poke the hole will tear immediately. Kids will put it on, and then it’ll rip, and they’ll cry, and then it’ll be sad. So what you wanna do is where you put the whole, you want to put a piece of tape to reinforce it on each side, probably on the back. Just so you reinforce where you put your string, because otherwise it will tear and somebody will be really unhappy. You can see here I’ve done a bear and a cat. And we will actually have the drawings for this on our website, so you’ll just be able to download these templates. We will do a bunch because they’re very fun, and I have a lot of them in my files, so we’re going to do that.
The other thing that you can do- this is very very fun, and I wish I could say I thought of this- but you know, there’s so much fun stuff on the Internet you don’t have to invent these things. You can just “steal” them, and I wish I did with this. This is something that’s called a cloth-pin puppet. So the way this works, I drew this alligator. You cut out here. I just colored him with markers, and notice I left his teeth white. Because the way this is going to work is we’re going to cut his teeth apart, and we’re going to make him into a puppet. Terrible cutting job, It’s alright, nobody cares if it’s perfect. That’s the best thing about art, doesn’t have to be perfect.
OK, so we’re going to cut right across where his teeth come together just like that. So if you had a cloth pin, unfortunately I don’t have one right here. But if you have a cloth pin, you would tape or glue each side to the cloth pin. Now probably you’re not going to have a cloth pin, so what I’m going to do here is I’m going to make a little loop out of a paper and tape, my fingers are big, so probably this is going to show, but if you have a small finger like a child would have, it won’t show. OK, so we’re going to put this together like this. I firmly believe in using as much tape as you can. I’m not a fan at all of a wet glue with kids. It ends up everywhere. So the more you can use dry glue, the better it is. We’re going to glue his nose on here, and then will glue his body on the other side. Then what happens? When the glue is dry, you should be able to put a finger in the top, a finger in the bottom. You see, you could make his teeth open and close, and you can just do that with your fingers. You don’t need a clothespin, but of course it probably is more fun if you had an actual clothespin. Chuck, Chuck, Chuck.. pretty fun. You can do all kinds of little animals, and we will eventually have a sheet of little animals for this exact project on our website and we’ll have a lot of these. A lot of these projects on it.
Another thing you can do with kids, you know they’re all looking for something to do, something that’s gonna interest them. Sometimes kids are really interested in stuff, and sometimes they’re just not so. You have to find something that they like to do. These are buildings. What I’ve done is I’ve just cut out shapes. That are look like buildings, so just straight up and down, and some that have little roofs on them. You know the kids can just draw the lines for the windows. They can make these buildings anyway they want. They can make it look like a face, they could put a big smile on it if they want, ’cause it’s their work, doesn’t matter, and they can decorate it any way they want with crayons. When they get them all decorated, they can get another piece of paper, they can glue their buildings on the paper, so you can see that as you get all these buildings of different shapes and sizes on the paper, and of course they don’t have to be straight, they can be anyway you want, it is going to be a really fun project for kids, and they going to like it when it is done. Very simple to do and very attractive.
One other thing you can do if you have a color paper, you can do this with white paper, but it is more fun to do with color paper. You can take a piece of color paper, this is a handprint butterfly. What you will do is fold this in half, you will draw around your hand. Of course, child has a small hand. My hand is pretty big. I am trying to do it smaller. Then you will cut this out of your color paper. So this is going to look like butterfly wings when we’re done. So one of the things that kids love to do is they love to paste. This is a great pasting project. Here is the shape of our butterfly. I guess maybe that’s the top, and these are his little butterfly feelers. One of the things that you can do is you can get a piece from a catalog. I got some catalog pieces here, and I like to just tear them. I don’t think you need to cut them. So you just tear them out. Just get little pieces, tear them out and glue them on. Man, when you get done, it is amazing. You think this is a stupid project, but when you get done, it looks pretty good. The kids like it. They love to glue and they love to color. And it’s not hard. One of the things you can do to keep from getting glue everywhere is if you work on a piece of wax paper, or a piece of newspaper, or even a piece of page from the catalog, so you have something to protect the table that you work on from the glue. Kids get glue on their hands, get glue on the table, and they get glue everywhere. But you can see, even I am just tearing these pieces from the catalogue, when this is all done, this is going to look pretty fun. They’re gonna really like this when it’s all finished, and if you started with a colored piece of paper, it would even be better. I just did this with a white one, so it isn’t as pretty as if it was the colored one. Butterfly needs a body. What I try to do is to find something that is all one color. I guess this is a catalogue. I forget where they came from. Someone trying to sell me cloth. But here’s a catalog, It’s got a big orange spot, which is going to be perfect for our butterfly. So we can either cut or tear an oval piece for his body. Then we can actually draw a little face on him. He is a happy butterfly, and he can have a little face that is happy. And there is absolutely no way to do this wrong. This is a similar one done with color paper. And another piece of the catalogue that I just cut out. These are very simple things to do that can occupy kids for a long time, and they’re really a lot of fun.
And the other thing I want to show you is a simple book. Kids love to make books. You can make a book out of a single piece of paper. I know hard to believe the truth. So I have some samples here. Oh, here it is. So these are two different books. This is a book that’s made out of one single piece of paper. I’m going to show you how to do this, this is very very simple. This book is called a pair of pants book, and when you open it up, you’ll see why it’s called that, because it actually looks like a pair of pants when it’s opened. This is a legal size paper, just a little bit longer. You can certainly do it with this paper as well. The way you do this is you take your piece of white paper, or any colored paper, you folded it in half. This is called a hotdog fold. I’m sure you can understand why it’s called hot dog fold, because it goes straight up and down. What you’re going to do is you’re going to open this up, and you’re going to fold this in half, exactly in half, you think this would be easy, but sometimes kids found this part hard, and they need lots of help. Then you’re going to turn this around, take the outside edge, and fold it to the middle. So we folded in half, and fold it in half again, and this edge going to the middle like this. Now we’re going to turn it over, and do the same thing with the other piece, so the edge going to the middle. I’m going to put a diagram on how to do this on our website. I know I’m making it look easy, but when you go to do it, you’ll say how she does that? It is really pretty easy once you do one, you will have it. Then we are going to open this up, kind of looks like a paper airplane that’s not pointed, and we’re going to take our scissors. and we’re gonna cut right along this crease that we use for the center crease. But we’re only going to cut to here right to where the first fold is. So now when you hold this up. You’re going to be able to see through it like it’s a little hole, and then we’re just gonna push it together like this, fold it down, and there you see you have your amazing book. Now I know I made that look easy, but I have to tell you the first time you do this, it won’t be easy. You’ll see, Oh my gosh, this is hard, but after you do a couple of them, you’ll get it, and you’ll have your book, and then kids can of course write in the book, cut paper, and glue into the book, and If you want more pages in your book, you just make another one, and paste it on, and you’ve got you know instead of four pages, you’ve got eight.
This pair of pants book is very similar. I got another piece of long paper here. I like to use a little bit longer paper for that, because it just seems to lend itself to it. This is the legal size paper, so we’re going to make our hot dog fold here, then we’re going to do exactly like we did with our other book. We’re gonna fold it to the center like that, this is called a hamburger fold, ’cause you know it kind of looks like a hamburger, I guess if you had a square hamburger. Then we’re going to take the open end of it, fold it to the middle, Just like exactly the same way we did the other book. So the difference between these two books is how you cut it. So the other one we cut it right in the center, and had a hole in the center. But what we’re going to do with this one is we’re going to open one end like this, and then we’re going to cut the whole thing, right down that crease to the center. Now you can see we have our pair of pants book, which is why it’s called a pair of pants book. Oops I missed this little spot there, and then what will happen? We fold this up, and we have our book. And it’s the same thing that kids draw on it, color on it and whatever they want to do. And if you want to make it bigger, you can just make another one and attach it. This one is a little taller because the paper is a little longer. So there you have it. I’m now out of ideas, but I’ll be back another day to give you some more projects to do with your kids. Barbara Mason from Golden Road arts.
Artists along the Golden Road experience the northwest through the art and the artists who live here. Helping us celebrate artistic creativity, and to share what enriches us with our communities. We extend these gifts to schoolchildren through art education. Artists along the Golden Road draw energy from the organic sensibility and rustic beauty of the majestic lands we call home. Golden Road Arts, celebrating art, empowering artists today and tomorrow.
Get Immediate Access to Quality Art Lessons Today
At Golden Road Arts, we help parents and teachers deliver a wide-ranging art education to young children. Our content includes instructional lessons, art literacy classes and insights into historical artists. Browse our free art lessons now and support us by donating.
Samples