Welcome back to another free art lesson from Barbara Mason of Golden Road Arts. In the last tutorial, we began a new three-part series with Solarplate Printmaking Tools and Techniques Part 1.
Today we bring you the second video in the series. Watch as Barbara explains how prints are exposed under UV light and then prepared in a washout tray.
Solarplate Printmaking With UV Light Video
Find out how the design compositions we created in the first video are exposed under UV light, then treated in a washout tray to harden the plates.
Materials Required for Solarplate Printmaking With UV Light Exposure
- Solarplates
- UV exposure unit
- Wax paper
- Felt
- Aquatint screen
- Acetate or mylar sheets
- Washout tray
- Paintbrush
- Newspaper
- Wooden board
- Plate glass
Watch Solarplate Printmaking Art for Kids
Follow along with the video transcript as Barbara Mason outlines the general process, exposure times, plus the potential issues in solarplate printmaking.
Welcome to Golden Road Arts. This is day two of our solar plate demonstration. What I’m going to do today is expose these plates. I’m going to be using our mylar that we created yesterday with the ink and the China markers. And in order to do this we have to have an exposure unit, which is UV light which I have right here. Inside of this is a face tanning unit that is UV light. So it’s in this big heavy wooden box for a couple of reasons; number one, we want the weight to hold the plate down, hold the glass down. And number two, we want to protect our vision. So UV light is dangerous to your eyes; it’s like looking at the sun, not a good thing to do. And so we want to make sure that our eyes are protected.
The first thing that we’re going to do is we’re going to get our piece of glass. I have a piece of plate glass. You can’t use window glass; it’s got to be plate glass. This is ¼” plate glass. The reason you can’t use window glass is window glass has a UV inhibitor in it because you know you don’t want your favorite chair or your favorite carpet to fade in the sun. And so window glass has a little bit of an inhibitor in it to keep that from happening.
And then I have a piece of wax paper and it’s only job is to keep my piece of felt clean. I have a piece of felt here and this is just a little cushion so that our plate will have a little cushion behind it to make sure we have good contact with the glass. So we’re going to put down our piece of wax paper and then we’re going to get our plates.
I bought these from solarplate.com from Dan Wheldon and you can see that they come in this black plastic wrapping because the idea is we want to keep them out of the light. Get a couple of these out. I think we’ll expose two of these at a time. So we want to keep these in the dark until we use them.
So it’s pretty important to close this bag up at night and keep them in the dark. In order to make this process work for an intaglio print, which is an etching, which is what I’m going to make. The first step is I’m going to put a piece of aquatint screen. This is a random dot aquatint screen. It’s a stochastic screen if you’re a photographer. It is an 85% dot.
We’re going to take the plastic off of these plates, a very important step. If you forget this it’s not going to work very well, so we’re going to take the plastic off and then we’re going to lay our aquatint screen over the top of these. And we’re of course trying to keep them from the light. I’m going to put our glass down.
Alright, so we’re going to take our exposure unit, put it over the top of this and we’re going to set it for 40 seconds. 40 seconds is kind of the start for making sure we have a good black. At this point if we exposed it for 40 seconds and then we wash it out with water the whole plate would be black. And so what we’re going to do is we’re going to expose it for 40 seconds and make the whole plate black. And so what we’re going to lay our image on it and when we lay our image down on it what’s going to happen is the areas that are black will be protected and where are the areas where it’s white will harden. And so the black will wash out and the white will not. So what we’re going to do now is set this for 40 seconds. I’m just going to use my phone here to time this. I’m going to hit start and I’m going to turn on my exposure unit. 40 seconds doesn’t seem like it’s very long, but when you’re standing here watching it, it seems to take a long time. So what we want to do is make sure we’re ready to turn this off at exactly 40 seconds.
OK so we’ll stop and we’re going to lift this off. Now we’re going to use two of our plates. I exposed 2 plates at once here so we can move a little faster because I have eight to expose. So we’re going to take our plates and we want to get the side that has the ink on it down; that’s going to give us the best contact. We need to decide where we want to put this in here and how we want to do this. Here’s the second one.
OK now I’m going to put my plate glass back down over the top of this and now I’m going to expose it for 20 seconds. So if you had an image that was very fragile; if you had drawn on it with something that was a very fine pen and you know it just had very fragile lines or had a little wash on it like with India ink and water with a very thin wash, then you would maybe do 15 seconds. Because the way this works is backward from your thinking; the less time you expose it, the darker it will be. It’s very backward; the more you expose it the lighter it will be.
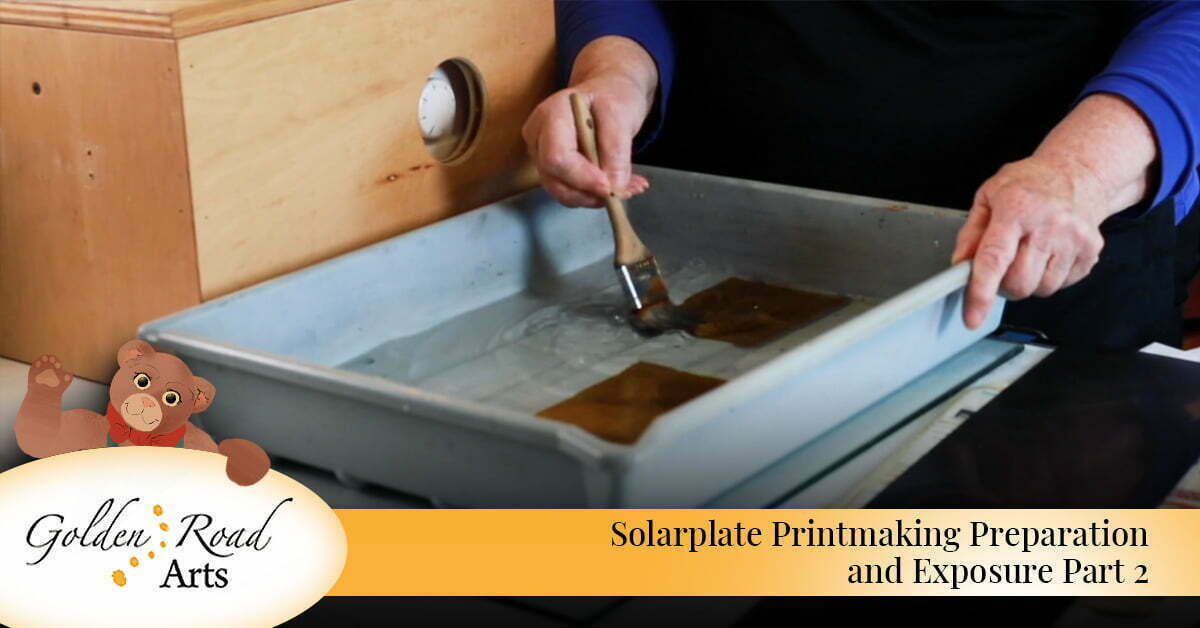
Alright, let’s get our timer again. OK so I’m going to turn this on. We’re going to start with 20. So now my plates have been exposed and so the next step is to wash them out with water. I’m going to just lift my water over here. I have a tray here that’s got hot water in it; well, not hot water but warm water, you want it to be warm you don’t want it to be cold. So we’re going to take our plates, we’re going to submerge them in the water, and then we’re going to take our brush.
This is just a little brush from Home Depot – costs $1.50, a very inexpensive brush but very soft – and so we’re just going to wash these plates out for about a minute. Just kind of swish it around real good. So when you start to do this you’ll start to feel your brush grab. It’s grabbing the places where the material is washing away, so there’s kind of a fine line between washing these out and leaving them in too long and not leaving them in long enough. You want them long enough to develop and you want them not too long so that they don’t lose information.
So now I’m going to take these plates out of the water from I’m going to lay them on a couple of pieces of newsprint from the phone book. I’m going to be real careful not to get my hands in this stuff because we don’t know what’s in it. You know how often as an artist someone will say to you “oh it’s perfectly fine, don’t worry about it.” Well, you know we didn’t worry about it and then some people died of cancer, so it’s pretty darn important to worry about it. We want to be sure that we’re not putting our hands in something that might damage us later on.
These just have to be hardened and so what happens is that if you touch these now you’ll see that they’re sticky. We don’t want them sticky. So what we’re going to do is we’re going to put them in our box again and for about five minutes we’re going to let them cook. But I’m going to have some other plates to wash out so I’m just going to set these aside and then we’ll cook them all at the same time.
We’re going to take our screen. This screen has a dull side and a shiny side and you want the dull side down and I have marked the top of us the shiny side with a little piece of tape so that I never get confused about which side is supposed to go down. Now we’re gonna put this back on here and again we’re going to set this for 40 seconds. 40 seconds is a kind of your baseline. What you’ll do is you’ll leave the 40-second one alone and if you’re trying to get things lighter or darker you’ll actually move the second exposure – the one with the image on it – either less time or more time. If it’s too light, you want to have more time, and if it’s too dark you want to have less time.
There’s our 40 seconds. It’s absolutely backwards of the way you would think you would do it. Now we’re going to take our images. We’re going to put this in our water like we did before. So I think you can actually use this water quite a long time. I don’t think that you need to change it between plates. I think you can wipe out quite a few of them with a little tub of water like this. Some people like to have it under running water, so it just depends, everybody’s studio is a little different.
Alright, this is looking pretty good. Do it for about a minute and run your brush over it. I’m pushing down pretty hard with a brush so I can really feel the image there. I can feel the grabbing the hair of the brush so I know that it’s really done washing out well. So now we’re going to get our newspaper or phone book pages, and you could use a bath towel for this, as an old bath towel would work fine.
OK so we want to blot them. You want to get all the water off. You want to blot them till there’s no more surface water because as long as they’re wet, they’re exposing, still washing out. You don’t wanna leave little puddles of water in them because that’s gonna show on your your finished print. Make sure it’s good and dry.
So now we’ve got four of the plates done. So you don’t wanna see that – yeah we call it a witness line but we don’t want to be witness to it unless we want to be witness to it and that would not be good. I’ve actually exposed a piece of Japanese paper that looked like lace, and for paper like that I end up using very few seconds; maybe 10 seconds, and it exposes pretty well. It’s a very fragile image. This washout is pretty important. If you don’t do it enough you’re not going to get a good image and if you do it too much you’re going to lose information.
Once you start doing this you’ll find if I do that kind of an image I know I have to leave it a little less time or a little more time. Now we want to post expose these. We’re just going to put them back in the light and it takes about 5 minutes for this part.
You can put these in the window and it will eventually harden them. I’ve left them overnight in the window when I have had things I had to do; didn’t have time to put it back in the machine.
The critical thing with printmaking is that you do step one, then you do step 2, then you do step three, then you do step four and by the time you get done with all the steps everything should turn out. So if it doesn’t turn out or things aren’t working right it means that you’ve missed a step; somewhere along the way you missed a step.
Say you wanted to do this in the sun, say you said I don’t have one of these handy dandy little exposure boxes and how am I going to do this, how am I going to do this if I just have the sun. So what you can do is you can get a piece of wood that is bigger than the biggest plate you want to do and you can get a piece of plate glass that’s about the same size as your wood. If you’re doing an 8” x 10” plate you want the glass to be like 12” x 16”. You don’t want it any bigger than that because if things are bigger what happens is the glass will bow; it’ll bow up in the middle and you won’t have good contact because you don’t really have anything holding it down.
So you would take your board and then you would put a couple layers of felt (I bought at the fabric store) and then the plate and then the glass with the plate and then the aquatint screen then the glass. And so at that point, I would cover the whole thing with a piece of plastic. I would run outside, I would set my timer, I’d whip the plastic off and then I would wait the 40 seconds. I’d whip the plastic back on, pick the whole thing up, bring it back in the house, put the image in, put the black plastic back on, go back outside and set my timer for 20 seconds, whip the black plastic off and at 20 seconds I would put the black plastic back on and bring the whole thing back in the house. And then I’d wash my plates out in water.
You want to do it in the middle of the day when you’ve got bright sun. You want to do it when it’s not raining, obviously. If these plates wash out with water getting them wet is not a good idea. Plus, if you get raindrops on the glass it’s going to show, it’s going to make a mark on your plate and maybe not a good mark. It’s not something that you really wanted, although, I suppose it could be interesting, but it’s only interesting if you want it, not if you’re surprised and you go what the heck is that spot. And of course, it was a raindrop.
We’re going to give this a good five minutes and then I’m going to show you how to print these plates. Now I am very fortunate as I have these two really beautiful presses. I have a little combination press called Dickerson that’s pretty old. I’ve had it for 30 years and I know it was probably 30 years old when I got it. So this is an old, old press but it still runs fine. And the really nice thing about it is it’s motorized, so I just have to push the button to get it to go through, and that’s a really good thing.
The other press I have is called a Ray Trayle press. There was a gentleman that lived in Portland and he retired from his job as a machinist, and his sister was a printmaker. She said “Ray, could you build me a press?” and he thought he could do that and so he went and looked at a few presses and he built her press. And then her friend said “Gosh Ray, could you make me one” and so he made another one. And by the time he died he had made 81 presses, and I have #41, and I feel very lucky to have this press. It’s just an absolute work of art.
Solarplate Printmaking and Other Free Art Lessons for Kids
At Golden Road Arts, Barbara Mason creates a wide range of instructional and art literacy lessons for children in the home or classroom. Our lessons are available for free online or during live events in Oregon. To learn more, watch our free art lessons now.
To ensure we can continue providing free art content for parents and teachers, please consider making a donation or purchasing art from our online art gallery.