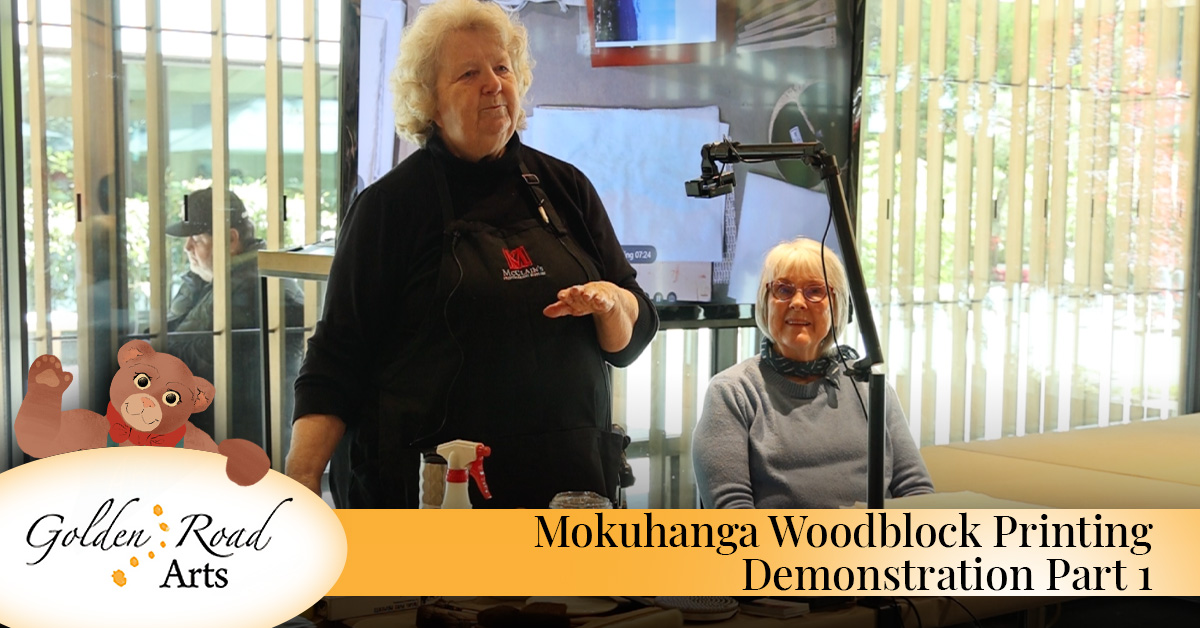
Welcome back to another art lesson from Golden Road Arts. In today’s video, Barbara Mason demonstrates the benefits of art for kids with a hands-on introduction to mokuhanga. This traditional Japanese woodblock printing technique combines carving, color and composition to create beautiful hand-printed artworks.
Getting Started With Mokuhanga Woodblock Printing
Follow along as Barbara Mason demonstrates the full mokuhanga process. Learn each stage from preparing your wooden block to applying pigment and printing on Japanese paper.
Materials Used in Mokuhanga Woodblock Printing
- Mokuhanga woodblock
- Reference photo or drawing
- Mylar
- Carbon paper
- Pencil
- Pigments or watercolor
- Rice paste
- Water
- Water brush
- Small ink brushes
- Baren hand tool
- Bamboo baren, plastic baren or ball bearing baren
- Japanese paper
- Wax paper or non-absorbent backing paper
Watch Traditional Japanese Woodblock Printing for Kids
Read along with the transcript below to follow Barbara’s mokuhanga demonstration and discover the tools, materials and techniques behind this traditional Japanese printmaking process.
Welcome, everybody. After all these years of struggling, I can say that I’m a printmaker.
I took a class at Oregon College of Art and Craft, which is no longer here. My kids were in high school and thinking about going to college, and I thought, “Oh, I want to go back and do some work.” I took a printmaking class, came home and told my husband, “This is what I want to do.” He said, “Okay.” So, thousands of dollars later and many, many classes later, I can say that I am a printmaker.
I started learning how to do this process when I was taking a class from Jim Hibbard at Portland State. I was loving printmaking, and I said, “What should I do this summer? I have the whole summer. We’re not going to be working. What should I do?” I thought he would say something like, “Go learn woodblock,” or something that I hadn’t done. But he gave me this whole big philosophical talk about what direction your life should go. I kind of went out of there going, “But…” I did decide to do woodblock.
My parents lived in Eugene, and I knew that the McClain’s printmaking people, who sold the tools for this process, lived in Eugene. So I phoned them up. I thought they had a store, but no, it was their home. They said, “Oh, come on over.” I would never have gone if I had known it was their home, but they were very gracious to me. The thing I remember about that is they had a tree growing up through the center of their house. Very unusual.
That was my introduction. Then I started looking on the internet and wanting to learn more. There was a class in woodblock printmaking in Victoria. My husband is Canadian, so I had been to Canada many, many times. I said, “Can I go to Victoria for a week and take this class?” He said, “Oh sure, go.” So I did. That was my introduction to this process.
Over the years, I’ve met many, many people who do it. There’s an organization called the Baren Forum. All of these pieces that you see here, some are mine, but most of them are other people’s. They are exchanges from printmakers all over the world. Usually, it’s 30 prints. You make 30, send them to a central place, they collate them, send them back and you get your own print and 29 others.
I’ve got many here in a book, and you’re certainly welcome to come up and look at it. The little ones here, the tiny ones, were for a particular exchange where we did 200 prints because they wanted us to suffer.
Actually, they just wanted us to know what it was like to do 200 prints. By the time you got to 50 prints, everything was working perfect. I think mostly when we had trouble, we just didn’t print enough. We just did our 10 or our 20 and stopped. It takes more than that for the block to be working right, to absorb the right amount of water and everything to be smooth. So if this doesn’t turn out today, I can blame it on that.
Here I have a lot of the tools that we use for mokuhanga. Some of them look really different. This is pigment, just pigmented suspension. It comes from Japan, by Holbein. The person who decided to do this decided to do it before Alex, who owns McClain’s, had these. I bought these quite a few years ago. I haven’t used them very much. Shame on me. But they’re wonderful. They’re just pigment. It would be like buying watercolor. Watercolor is a very expensive pigment to use for this, but you could certainly use watercolor.
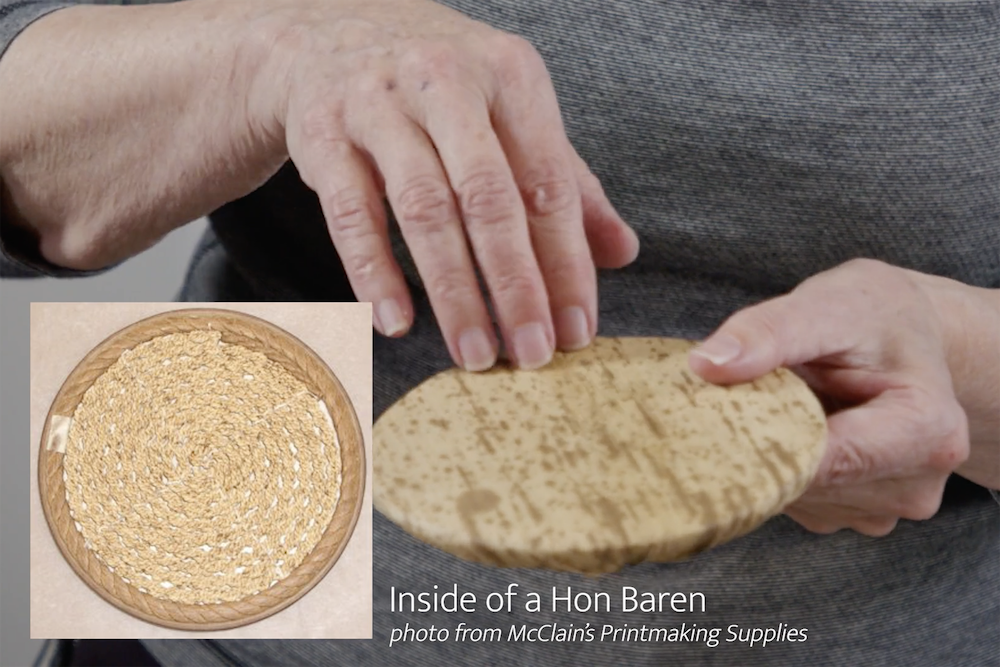
These are the tools that we use to print with. This is a baren, and it’s made with a bamboo leaf that’s pulled very tight over the top of it. You have to be strong to do this. It doesn’t look that difficult. I want to tell you, this is difficult. Have someone else do this for you. Do not do this yourself.
Well, I don’t know. You do it yourself, right? Alex does it herself. She’s stronger than me. It doesn’t look that good.
This is what the inside of it looks like. It’s a coil of bamboo that’s braided and then glued to this backing. Then the bamboo leaf goes over the top of it. It’s hard to do.
These are plastic barens. This one was very inexpensive. It costs about $5, just really cheap plastic. This one has a plastic disc in it that you can replace, so when you wear out the plastic, you can get another disc for it. This one is about $45.
This is a ball bearing baren. This is a single one. There’s one ball bearing. You can hear it. Can you hear that? It drives you crazy when you print with this because it’s so loud. This is a double ball bearing baren. There’s a ball bearing, and then there’s one underneath it. When you roll it, there’s no noise, so this one is better.
I bought this one about 15 years ago, maybe. At that time, I paid $350 for it, which seemed like, “What was I thinking?” I just wanted it. I don’t think I use it all that much. I’ve used it quite a bit, but I just wanted to have it. Some people just want to have all the tools. I’m one of those people.
These brushes that we use for mokuhanga include this water brush. This is a brush that you dip in the water, and then you dampen your paper. It’s very, very soft. Look at that. It just feels so nice.
These little brushes that look like shoe brushes are what most people use for mokuhanga. They use these brushes for bigger areas than I’m going to do. My area is pretty small. The print I’m doing is a small print, so I’m going to use these little tiny brushes.
When you start this, I decided I was going to do a Mount Hood. When you take a picture of something, you should always make it black and white because it looks quite different when it’s black and white. You can really see the light and the dark much better than you can with the color. Of course, that’s what we’re doing. We’re just stealing that picture.
I think it was Picasso who said, “Good artists borrow, and great artists steal.”
The first thing you do to make this is you do your drawing on this piece of Mylar. On the Mylar, in this little corner here, there are two little arrows. This is our registration system. This is called the kento system, and it’s extremely accurate. You could put the paper in this system 300 times, and it would always be in exactly the same place. It’s hard to believe that, but it’s true.
Everybody who is a printmaker has problems sometimes with paper registration, but this is very, very accurate.
This red paper is carbon paper, and it has carbon on both sides. You can see that the red is actually on the back side of this. Once you use it once, you can see where you put your lines.
This sounds complicated, but this whole process can be put in a little tote and carried with you. The tools are expensive, but you have them for your life. They just don’t wear out. You can take them and have them professionally sharpened. Daniel Jasa at McClain’s sharpens them, and it’s so worth it. You send the tool to have it sharpened, and when you bring it back, it’s like brand new. Then next year, you send it again. Believe me, it’s worth it to have them sharpened.
These are my test prints that I did for this. Alex graciously offered to assist me, and I thought that was pretty funny because she is certainly a better carver and printer than I am, but maybe more shy.
After we’re done with this little demonstration, feel free to come up here and look at all this stuff. I don’t think it’s possible to harm it. Go ahead. Don’t take it with you, but you can sure look at it.
I’m wearing this interesting little seat thing here because I hurt my knee at Christmas time, right after the holidays. I think I lifted something too heavy. I went to the doctor, and they said, “Well, you’re old, and you have arthritis.” I said, “Thank you. So helpful.”
This is the sky. You can see that I have gotten it wet here. Now I’ve already got my color, so this is going to be blue.
This little container is specially made for mokuhanga. It comes from Japan. It’s called a tupper, and it really is just a little Tupperware thing. It has its own special brushes. These are brushes just for the ink. Everything that you do has its own tools.
I forgot my paste. What holds the ink into the paper is this binder, and this binder is rice paste. This particular rice paste has an inhibitor in it so it doesn’t mold. How long do you think it would take this to mold? Forever. It never molds. It has some kind of formaldehyde or something in it that doesn’t mold.
You want to use just a little tiny dot of that, a little bit of paste, a little bit of water and a little bit of color.
When I first started doing this, I learned from a man who was absolutely insane about having everything perfect. Perfect has its issues. For a long time, I thought it should be perfect.
Then I took a class from a Japanese printmaker named Yuji, who taught at Oregon State. From him, I learned that you could do whatever you wanted. You didn’t have to be so fussy. His blocks were beautiful. There wasn’t a bump. They were just perfect.
Then I had a friend in New York, April Vollmer, and her blocks looked like she chewed them with her feet. They were all chewed up, but they printed beautifully. She just didn’t worry about the part that didn’t show. If it didn’t print, she didn’t care. She just gouged them and chopped them, and I thought, “Oh my gosh.” But they worked really well.
I learned that it didn’t have to be perfect. I learned that from Yuji. He said, “Oh, just do what you want.” I thought, “Really? We could just do what we want?”
You can see this doesn’t use very much paste. It doesn’t use very much ink. I’m just kind of scrubbing it into the block here. The block will only absorb so much paste, only absorb so much water and only absorb so much ink. That’s why when you print 200, it gets better.
I’m not doing 200.
My assistant is going to hand me the paper. Down here, if you could see this, there’s a little X made with a pencil, and that’s going to tell me where I’m going to put my kento. There’s a little mark here and a little mark here that are going to hold the paper. We call this crab hands. You’ve got your little pinchers. This corner goes here, and this goes here.
Then we have this interesting paper. It’s kind of like a piece of wax paper, but this paper does not seem to absorb water. You can use it a long time with no water.
When you use this baren to print, you go around and around just to make sure you got it. You can kind of see through the back of that. Can you see through that? You can see it through the paper. I could pick up a corner here and look at it to see how it looks.
Ooh, that wasn’t good. I missed that corner totally. Did I miss it because there was no ink, or did I miss it because I just missed it? No ink. That’s it.
Because everything is damp, you’re working with damp paper and damp pigment, so it’s pretty easy to go back and fix something. One of the things that I found when I first started doing this, and that I thought was absolutely amazing, was that if you wanted to print something darker, you printed it twice. I’m still kind of shocked at that. Trained as a regular printmaker, the thought of doing it that way was hard for me to believe, that you could just print it twice and make it darker. In traditional printmaking, you would never do that.
That’s because of registration. Well, yes, registration is a big thing. You wouldn’t have good registration, but the registration for this is so good.
What do you think? Does that look good? Do you think there’s enough on there? I think so.
I brought a lot of stuff with me today. You can see I’ve got stuff everywhere. But really, when you’re doing this, you don’t need very much stuff. You could put it in a shoe box and take it with you. It’s pretty compact.
If you were printing a really big piece of paper, this is pretty small. But what if you were doing a piece of paper that was maybe half the size of this table? There are people who print that big with this process. How you would do it is you would maybe take another piece of paper that was not wet, that was heavier, and lay it over the back of the paper you were printing. You would kind of use it as a carrier sheet.
Well, this isn’t good. We’ve got to have more stuff here.
I had a lot of fun learning how to do this. The first time I did it was when I went to Victoria. The block kind of needs to be broken in, and it will only absorb so much stuff. The theory is that the grain of the wood is going this way, and you’re supposed to go across the grain right before you print it.
Now we’re going to see if this is actually in the same place.
You can imagine how much work this is if you were going to print some of these images. There are a couple here from a printmaker in Japan, probably quite a few, whose name is David Bull. He actually started this Baren organization on the internet. The internet was pretty new, and we were just people all over the world who were interested in how to do this.
We became friends without ever meeting each other, just talking on the internet.
All right, you little stinker. Come on.
All right. I’ll do a wash across the top.
About 10 years ago, I want you to know that Alex and I had been working on this process together for about 25 years. We decided we would do a class. We decided we would do it on my kitchen table. We invited five or six people to come. Gradually, over maybe a year, we got fewer and fewer people, and finally it was just the two of us.
We said, “Well, should we advertise it again and get more people?” We decided no, we didn’t want to do that. So for 25 years, Alex and I have been meeting, just the two of us together, on Wednesday nights. We keep each other going. Sometimes we just have tea, I have to admit.
I want you to know that Alex is doing a series of prints, and we’ll get them online once she gets them printed. She’s been carving them all winter. It’s a series of six pretty small prints. They’re not very big. They are six Japanese lanterns from the garden. They’re going to be really nice. I’ve been watching her carve them for months. We don’t work very fast, and I’m anxious to see how they turn out.
Let’s see if this one is cooperating a little better than the other one. Maybe I should try printing with one of the other barens so you can see how it works.
It does have to be perfect. Yes, it does. It has to be perfect.
It’s just having problems with that upper corner. That corner over there just doesn’t want to come up.
I have to tell you, it’s good for people to see you have problems. If you make it look too easy, they don’t know.
We were talking earlier about a few years ago, when there was a woman who came from an institute in Japan called the Adachi Institute. They actually train people to do this process. They brought this young woman here from Japan, and she came to PNCA, which is now part of Willamette University.
The first thing she did was show us the tools for this. The tools are expensive, but you only buy them once. These barens, I mean, you could spend $800 for this baren pretty easily. This one was probably $200.
We watched her have a whole pile of these barens in a sack, expensive tools, and she just turned it over and dumped them out. We almost had a heart attack.
Then she was printing The Great Wave off Kanagawa. I don’t know if you’re familiar with Hokusai and his work, but The Great Wave off Kanagawa is pretty universally known for mokuhanga printmaking.
Japan is a little different in the way they approach this. They just keep printing. They have one person who draws the drawing, somebody else who carves the block, a third person who prints and a fourth person who sells the work. It’s much different than we would do it here.
After the Second World War, artists in Japan started doing the whole process themselves, but there are still many workshops in Japan that do it the old-fashioned way, where they have more than one person involved.
Let’s see if we got this.
I hate this corner. What is it with this corner?
Well, good enough. It’s a demo. Relax, Barbara. I think you should go on to a new block.
I’m going to do one more and then I’m going to do the next block because otherwise we’re going to be here until tomorrow.
Why do you add the paste? Well, the paste is a binder. It locks the pigment into the paper.
I have a funny story about the binder. Most Japanese paper has the sizing added onto the paper after it is made. With western paper, they usually put it right in the pulp. But with Japanese paper, it is added afterward. That’s why when you get Japanese paper, one side sometimes looks shiny and the other side looks dull. The shiny side is the side that has the paste on it, or the side that has the binder on it.
Watch Free Art Lessons for Kids Today
Golden Road Arts creates instructional and art literacy lessons to support children’s artistic development. If you enjoyed this art project, we have many more free guides suitable for elementary and middle school children. Watch more free art lessons online.